

Recording and Managing Audio Sessions
Hedy can record audio from your sessions for later reference, perfect for reviewing important conversations or sharing with team members who couldn’t attend. If you already have a recording from another app, you can import audio and video files instead. For capturing calls, see recording phone calls.
When recording audio, always ensure you have the consent of all meeting participants. Many jurisdictions require all participants to agree to audio recording. See recording laws and consent for an overview.
Enabling Audio Recording
-
Open Settings and go to the Sessions tab
-
Find the “Save Session Audio” section
-
Toggle “Enable Audio Recording” to turn the feature on
-
Accept any permission requests from your device when starting your next session
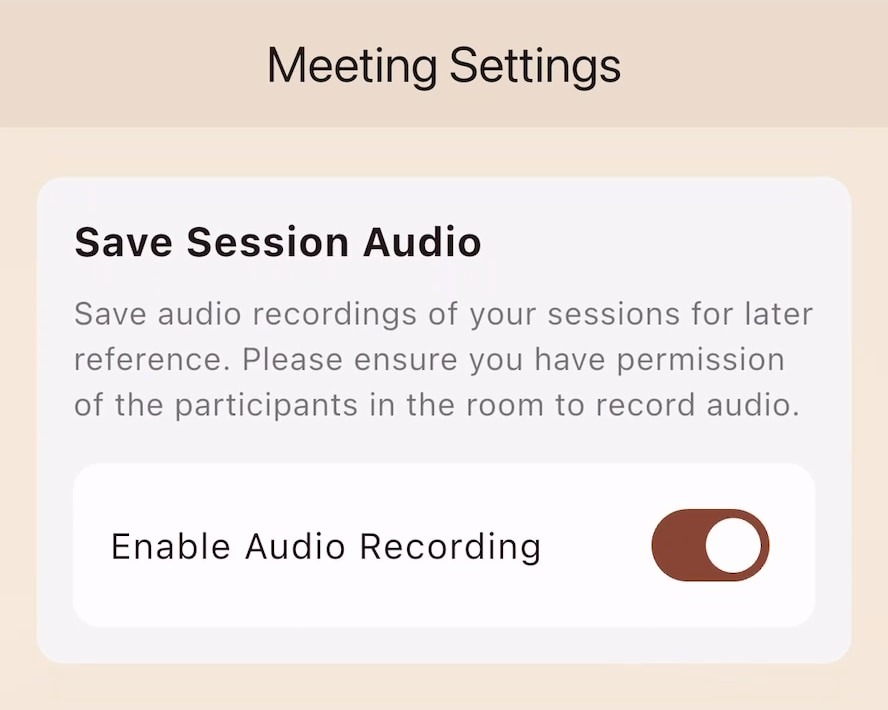
Audio recording is off by default. You’ll need to enable it before starting any session you want to record.
Accessing Recorded Audio
After your session ends, you can find the recording in two ways. Both work on the device that recorded the session. If you are looking at a session on a different device and there is no audio player, see Where Your Audio Is Stored below.
From the Session Screen:
-
Open your completed session
-
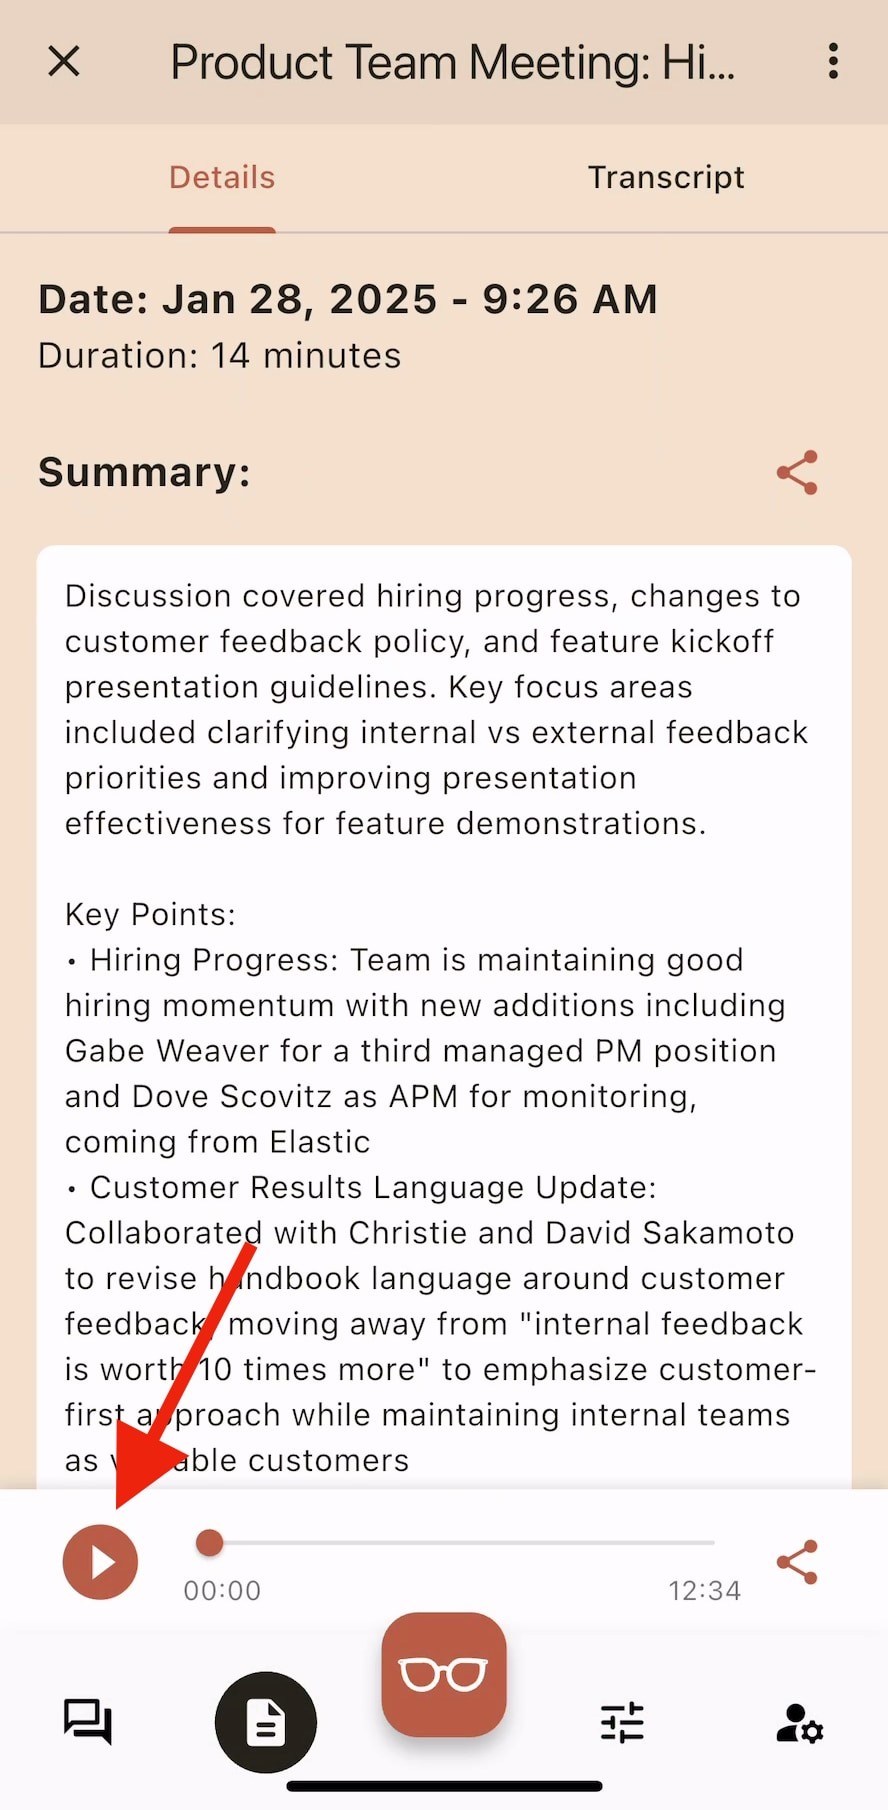
Scroll to find the audio player at the bottom of the screen
-
Use the play/pause controls to listen
-
Drag the progress bar to skip to specific parts
On Mac, Windows and tablets, the audio player also appears on the session’s Transcript tab, so you can listen while you read. To jump straight to a specific moment, turn on transcript timestamps and select a time.
From Your Device’s Files:
Android
Android devices store recordings in the Music folder:
-
Open your device’s Files app
-
Navigate to Music > Hedy
-
Look for files named “hedy_session_[date]_[time].m4a”
iOS
iOS devices require the Files app to access recordings:
-
Download Apple’s Files app from the App Store if you haven’t already
-
Open Files and tap Browse
-
Under “On My iPhone”, find the Hedy folder
-
Look for files named “hedy_session_[date]_[time].m4a”
Mac and Windows
The desktop apps have a Show in folder option that opens the folder holding the recording. Use it instead of hunting for the file, since it works wherever Hedy saved it:
-
Open your completed session
-
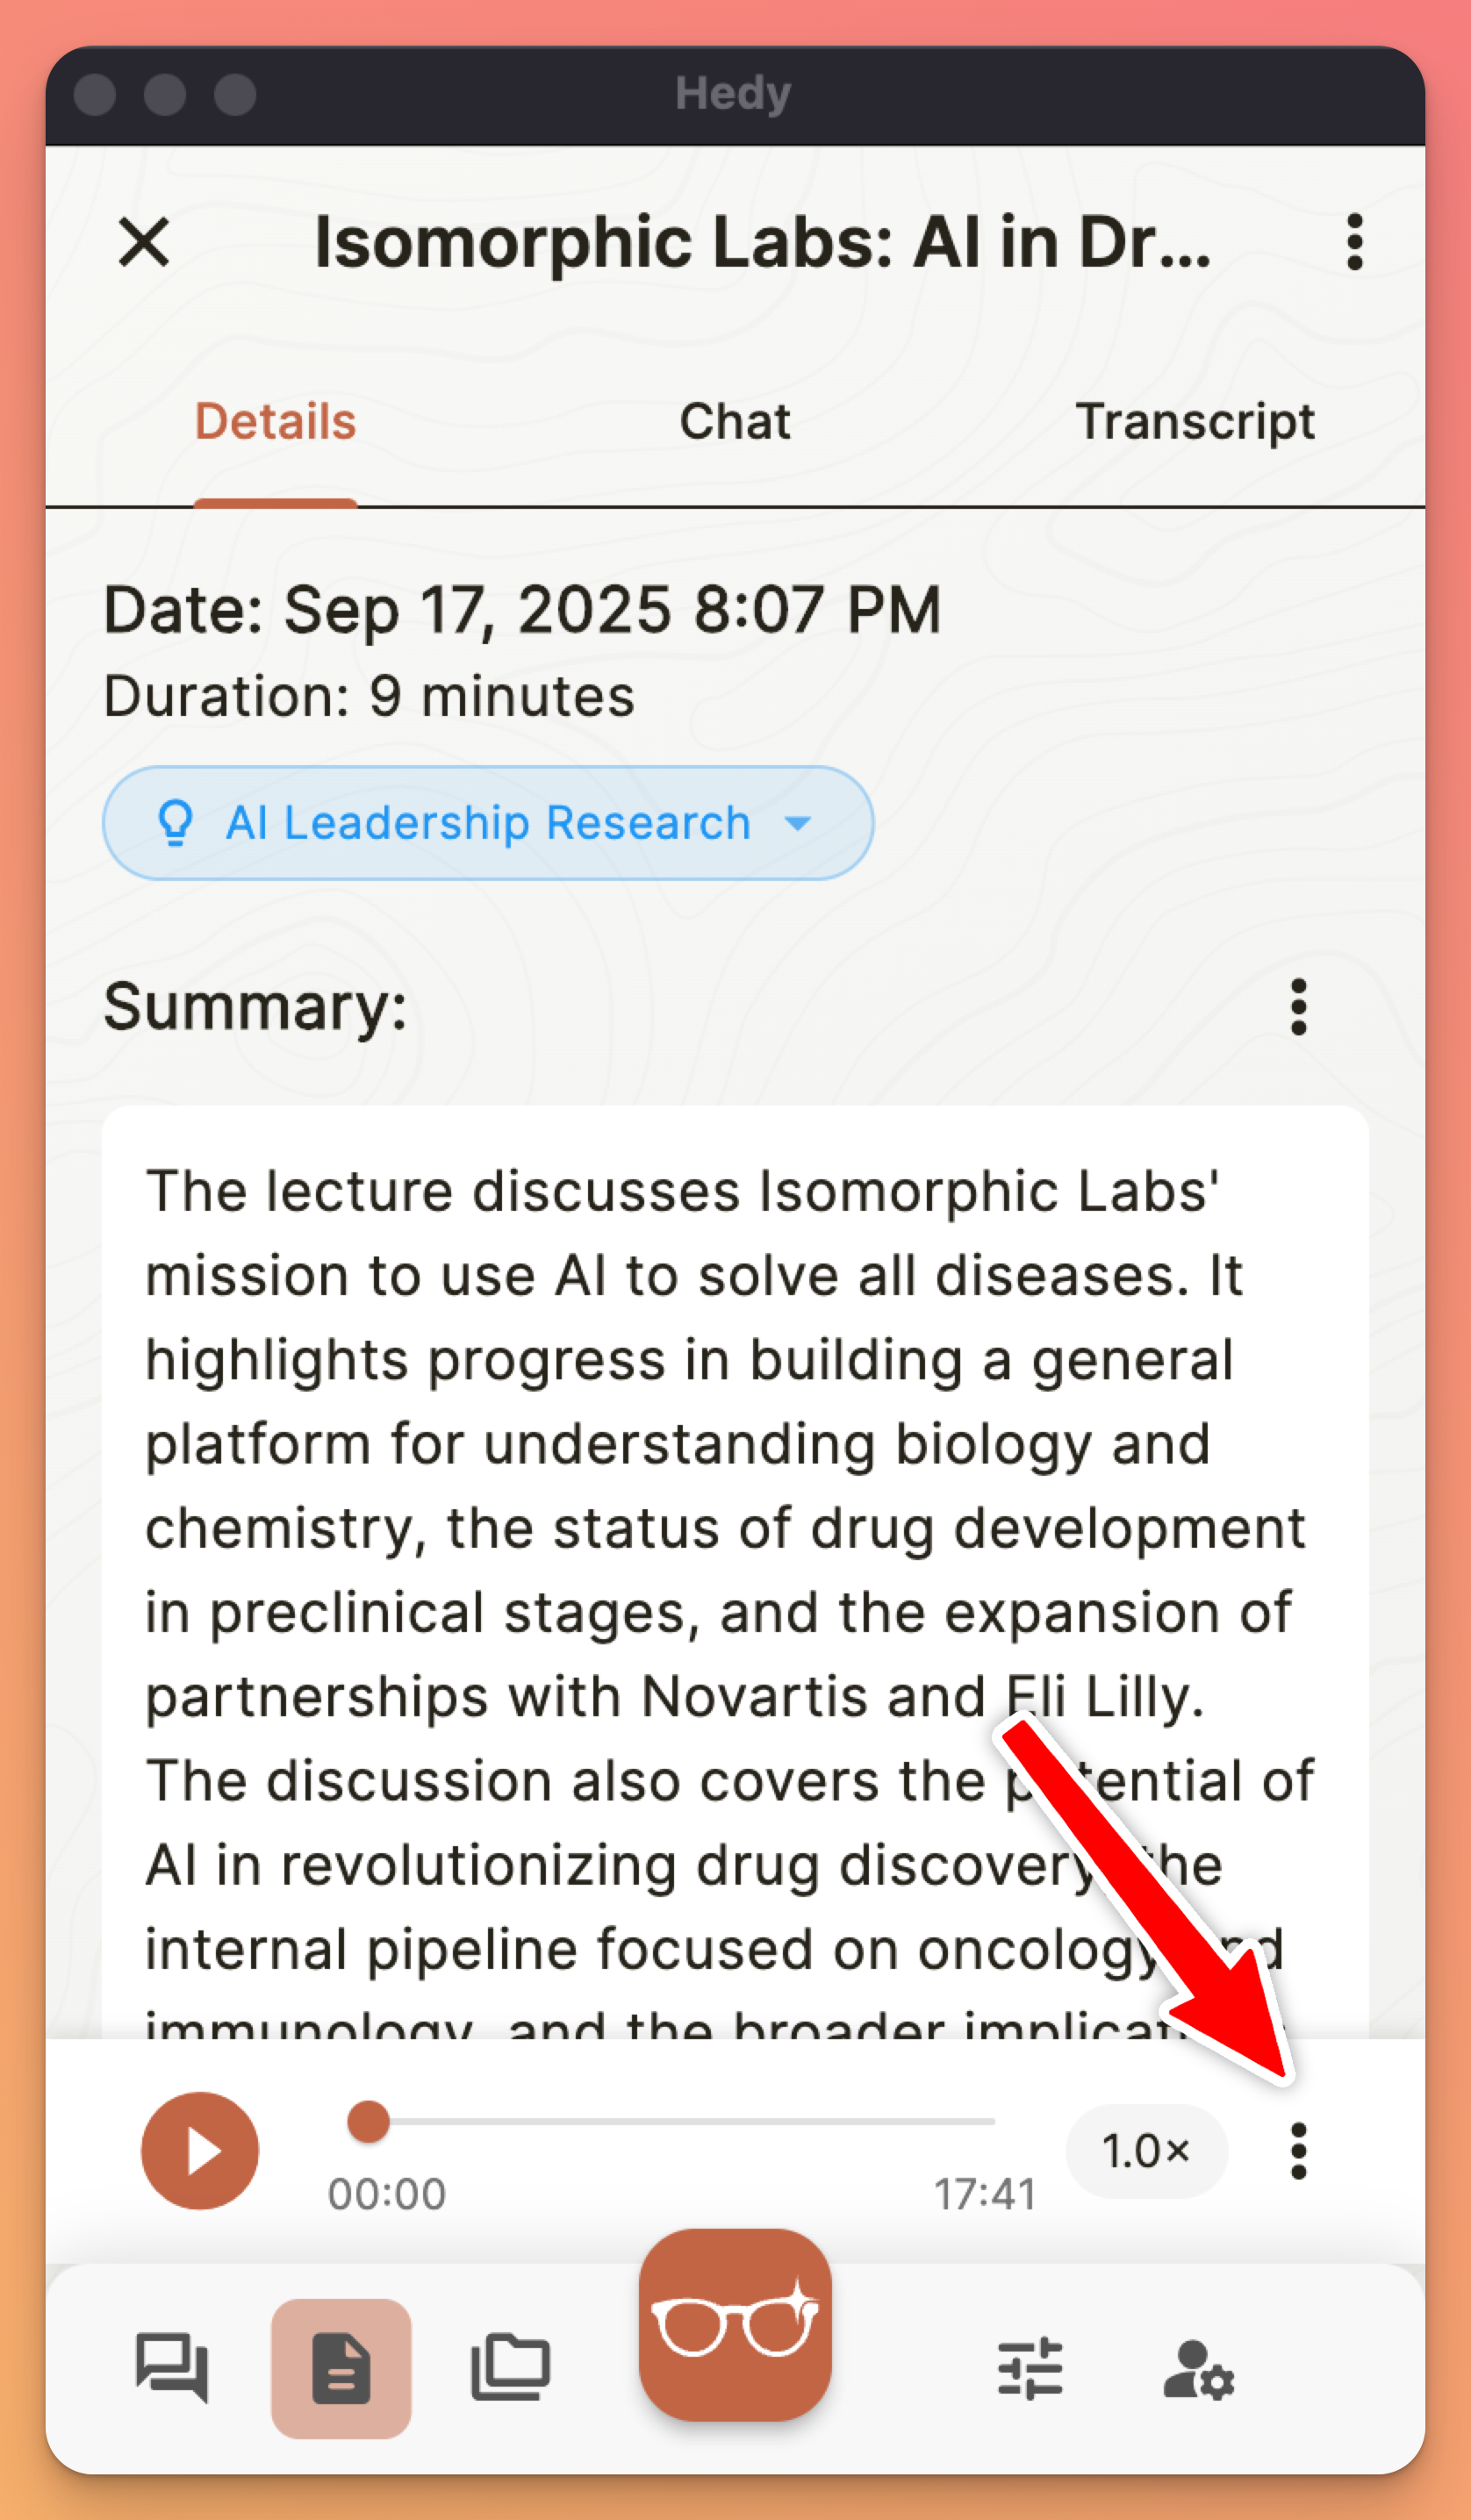
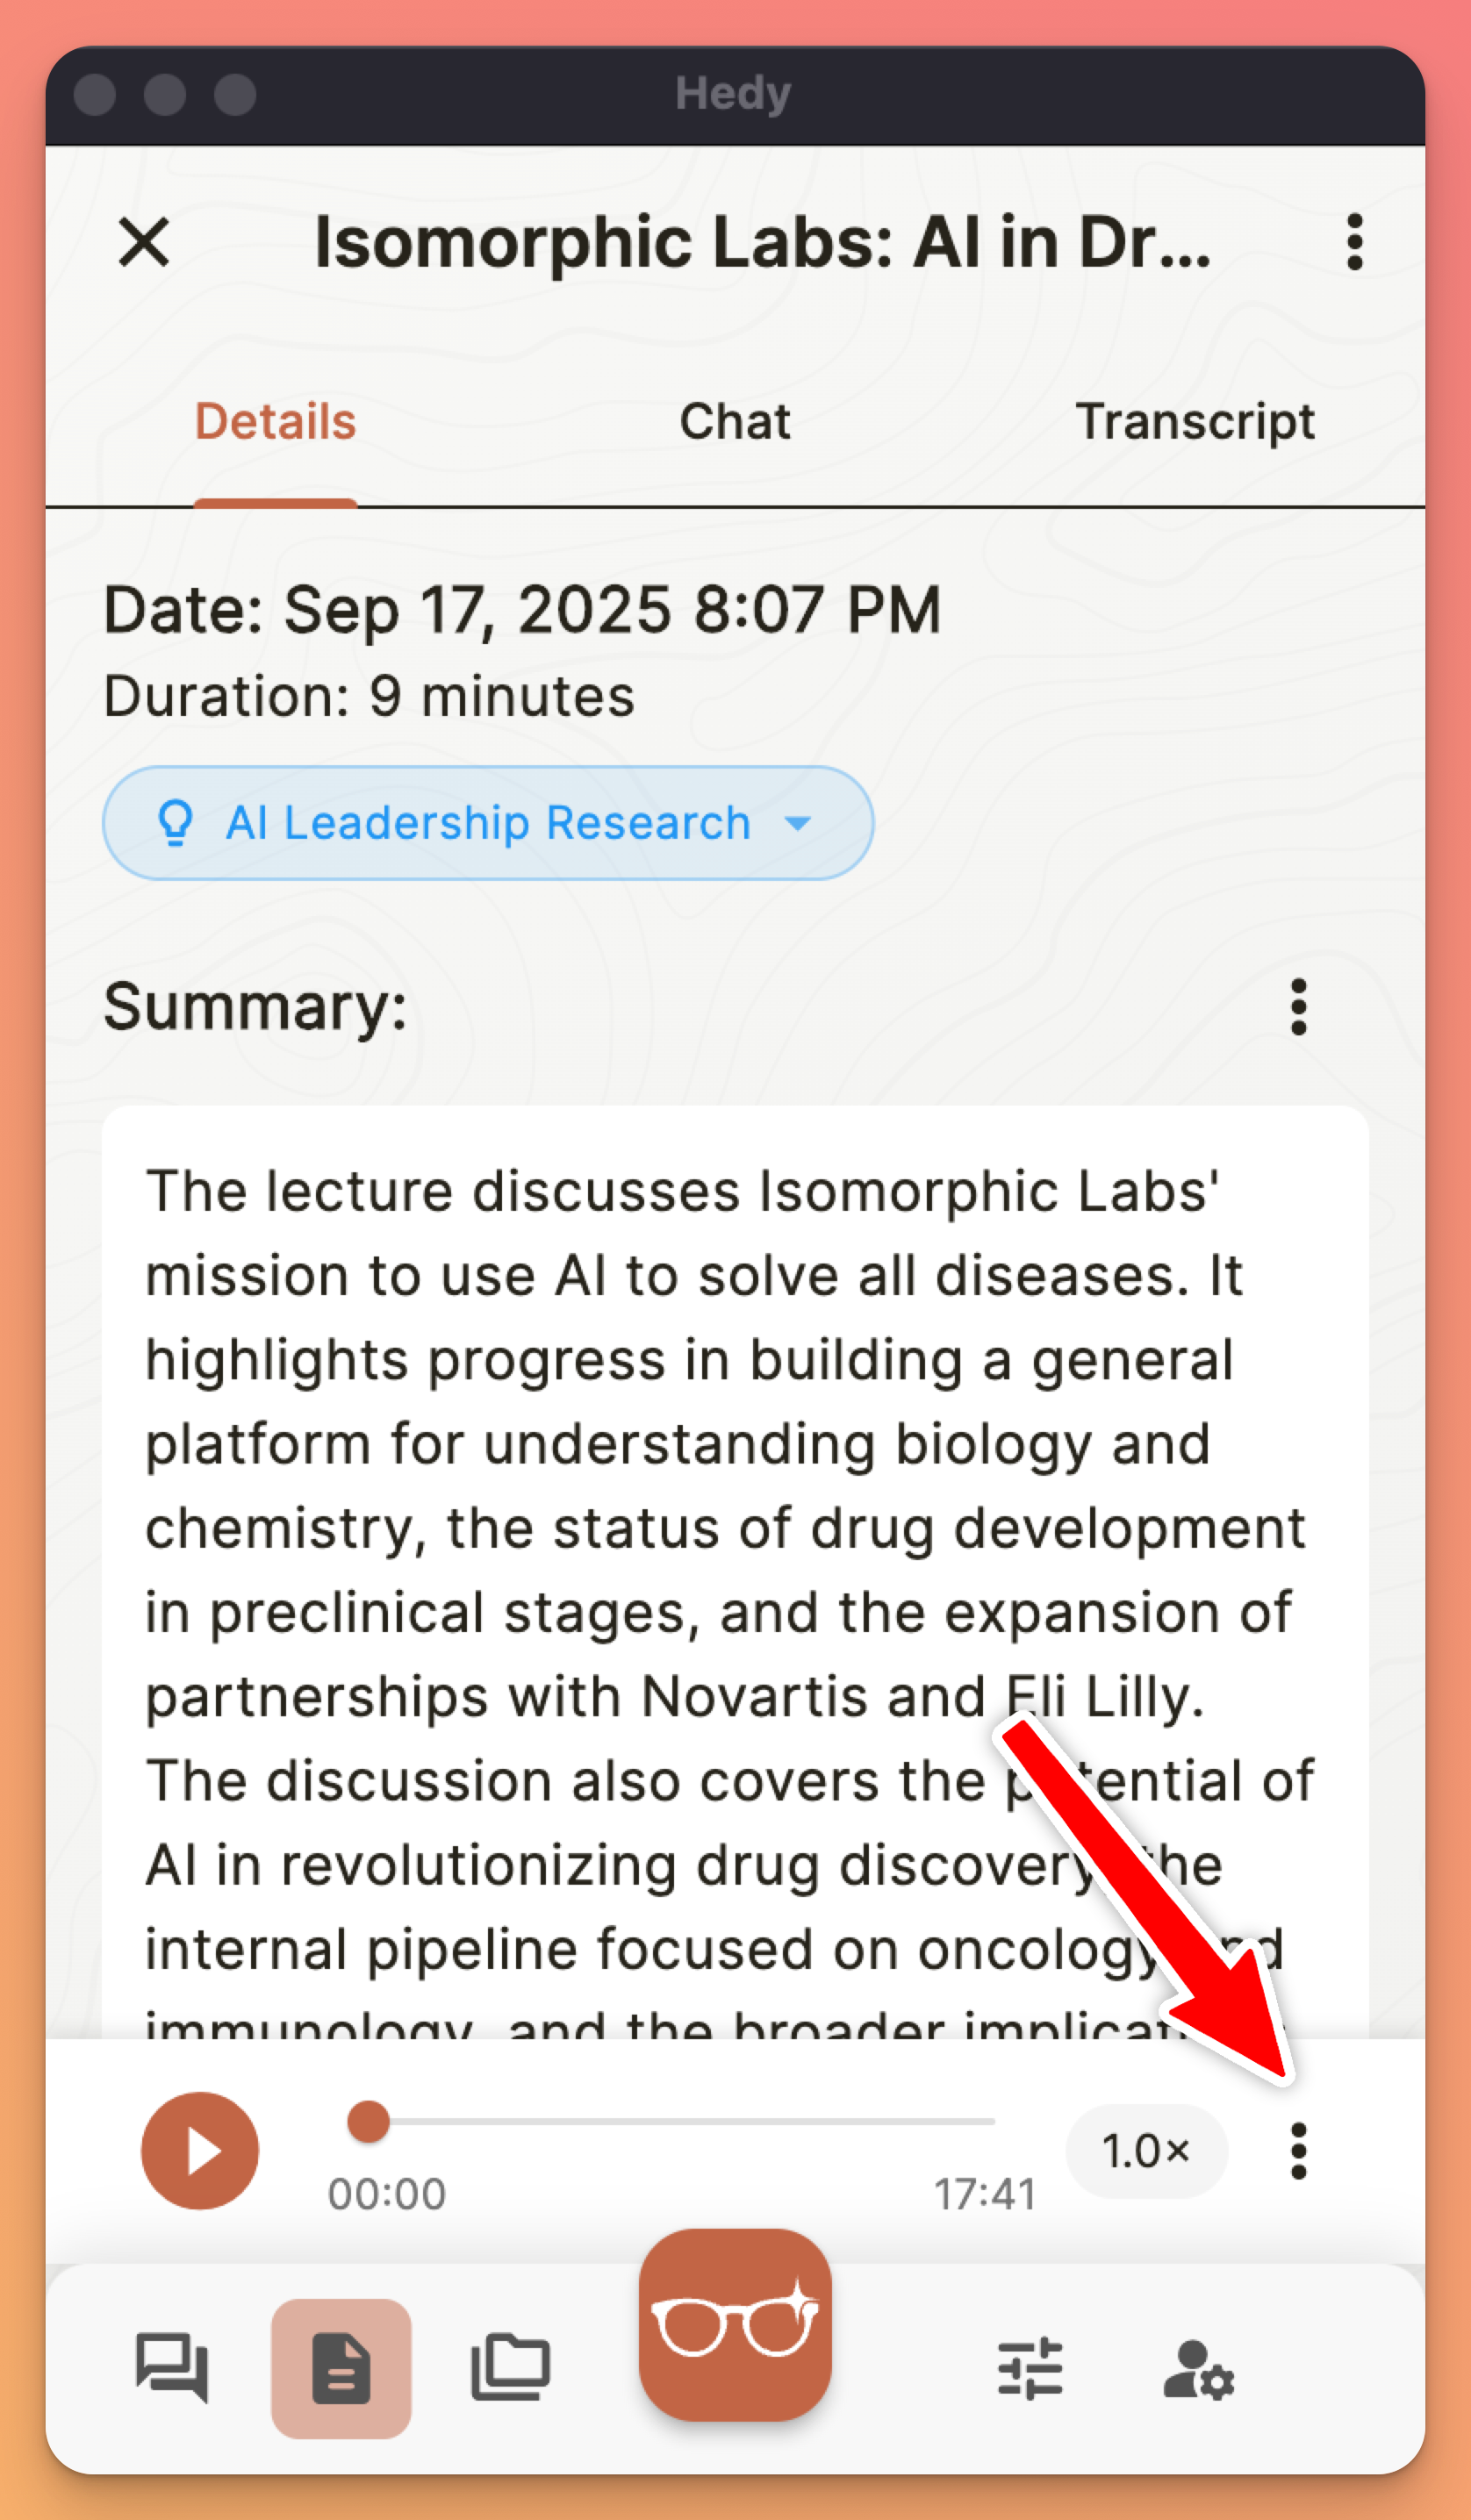
Find the audio player at the bottom of the screen
-
Click the audio player menu icon
-
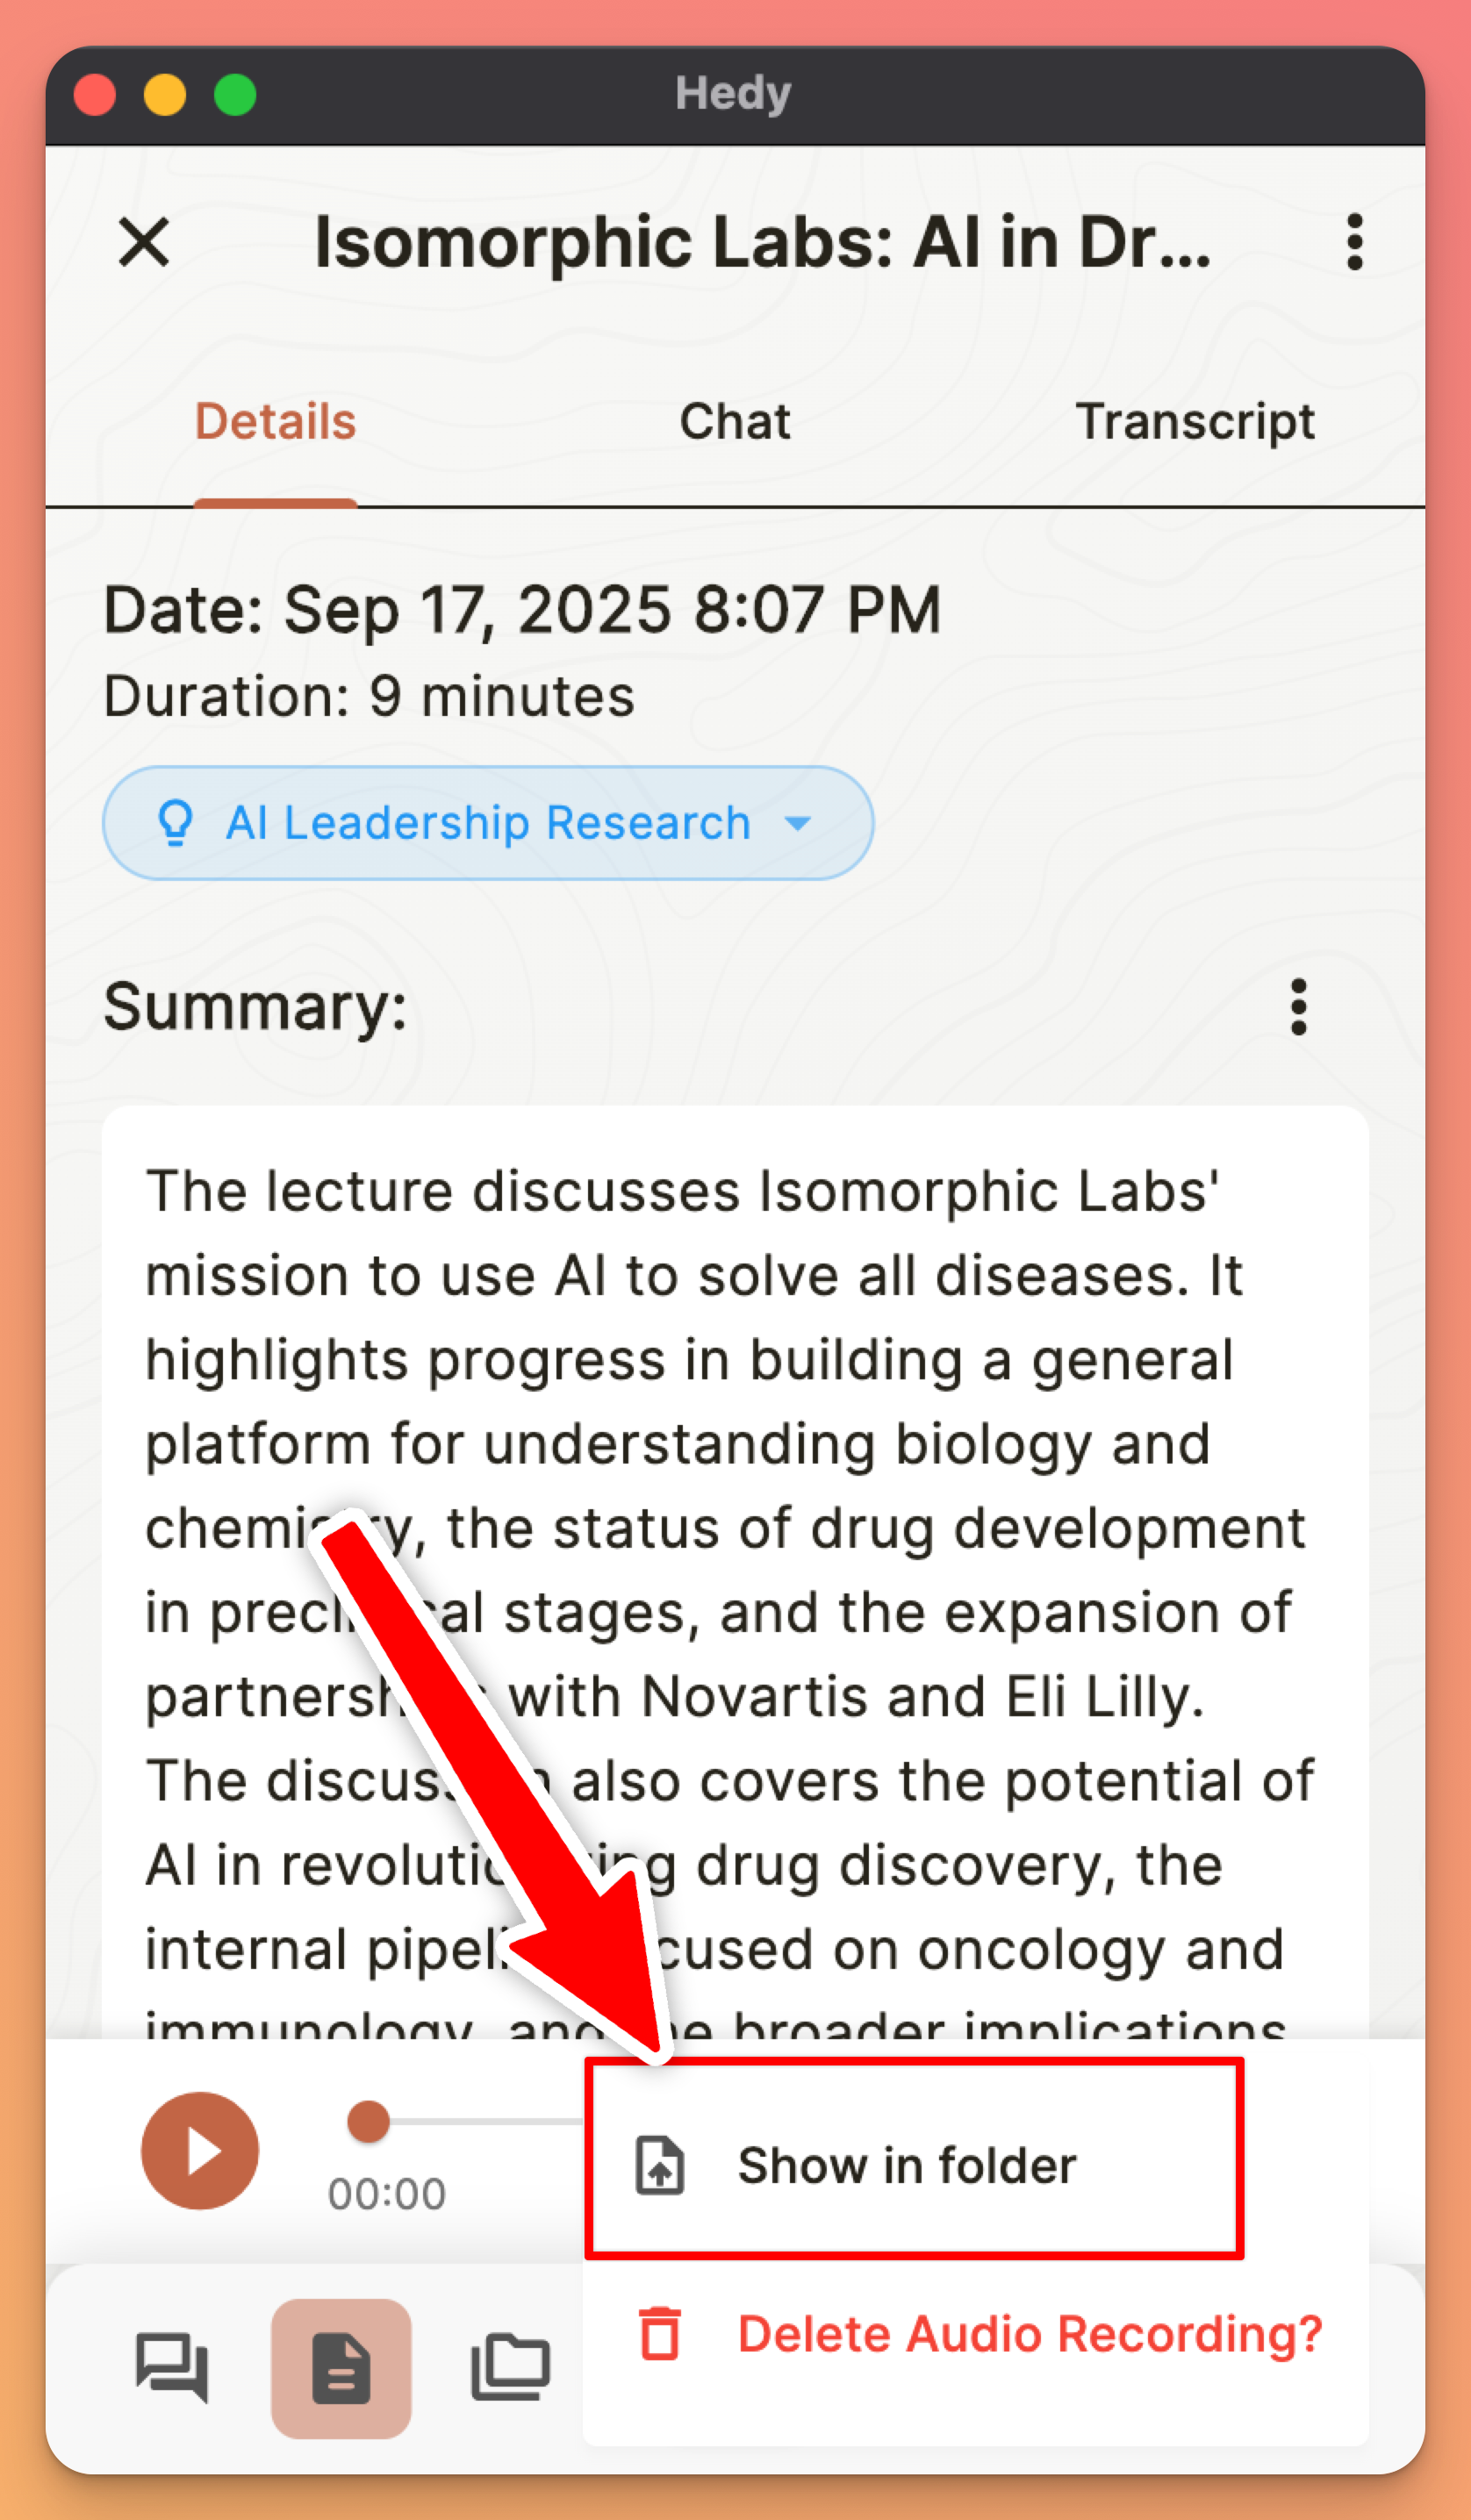
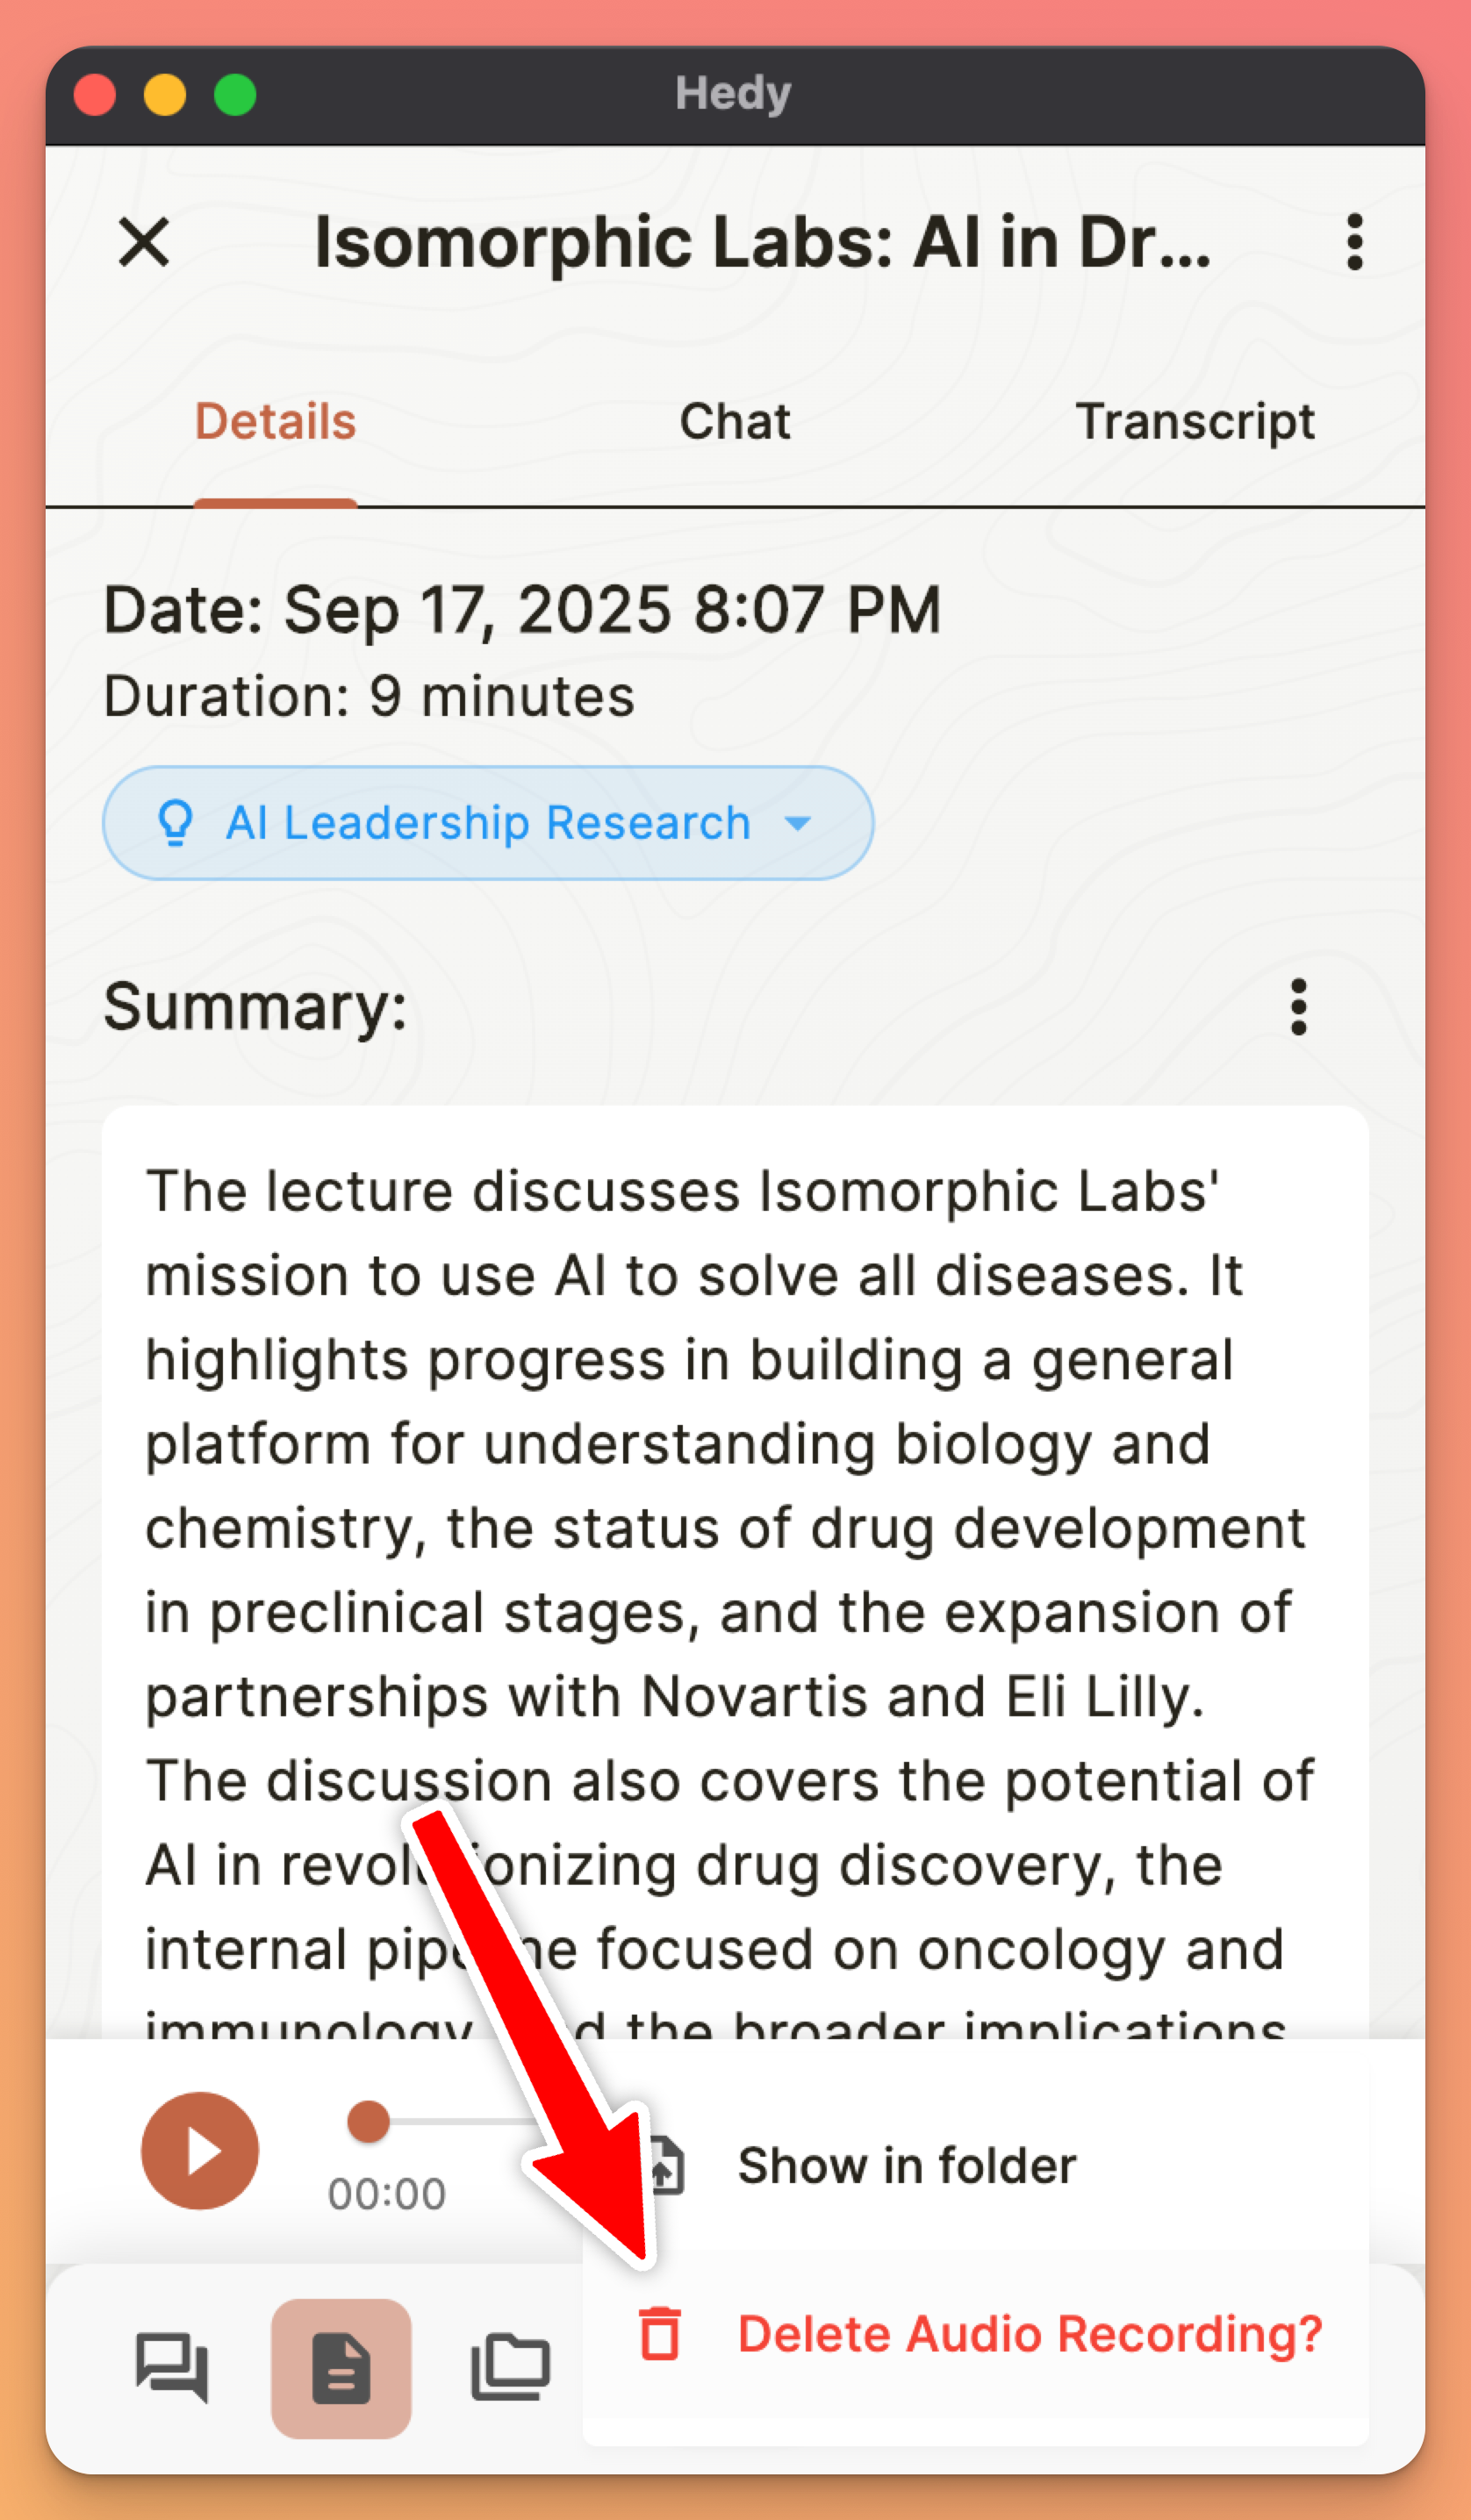
Select Show in folder
On Windows, recordings are saved to Documents\Hedy as hedy_session_[date]_[time].m4a. If your Documents folder is redirected to OneDrive, Hedy saves to %LOCALAPPDATA%\Hedy instead, so look there when Documents\Hedy is empty or missing.
On Mac, Hedy keeps recordings inside its own app container, which you cannot browse to conveniently in Finder. Use Show in folder.
Where Your Audio Is Stored
Session audio stays on the device that captured it. Hedy does not upload recordings to its cloud, so a session recorded on your phone has no audio player when you open that same session on your Mac or PC.
That differs from how the rest of a session behaves. Cloud Sync covers the transcript, notes and highlights, which is why a session shows up on all of your devices while its recording exists on only one.
Between Apple devices, recordings can sync automatically: turn on Sync Recordings to iCloud, covered in the next section. Between a Mac and a Windows PC, or to or from Android, there is no automatic transfer, so send yourself the file using the steps under Sharing Audio Recordings.
The same applies to imported files. When you import an audio or video file, the audio stays attached to that session and plays back like any other recording, on the device you imported it on.
Syncing Recordings Between Apple Devices
If you use Hedy on both an iPhone and a Mac signed in to the same Apple ID, audio recordings can sync between them through iCloud. Cloud Sync handles the session itself (transcript, notes, highlights), while Sync Recordings to iCloud covers the audio file.
To enable on each device:
-
Open Settings and go to the Privacy & System tab
-
Turn on Sync Recordings to iCloud
-
Repeat on your other Apple device
Both devices must be signed in to the same Apple ID, and iCloud Drive must be on for Hedy. Recordings made before you enabled Sync Recordings to iCloud will not sync retroactively. Only new sessions are uploaded.
Accessing a synced recording on the other device:
When a session has audio in iCloud but no local copy, a “Recording available” bar appears at the bottom of the session screen with a Download button. Tap Download to pull the recording onto the current device. Once downloaded, the regular audio player replaces that bar.
If the Download button doesn’t seem to do anything:
-
Wait a few seconds and tap Download again. iCloud sometimes needs a moment to make a freshly uploaded file available on the other device
-
On iPhone, open Settings, tap your name at the top, then iCloud > “Saved to iCloud” (or “Apps Using iCloud Drive” on some versions), and confirm Hedy is toggled on
-
Check that you have enough free iCloud storage to receive the file
-
Confirm both devices are signed in to the same Apple ID
Adjusting Playback Speed
You can adjust the audio playback speed to review recordings faster or slow them down for detailed analysis:
-
Find the audio player in your session
-
Tap the speed indicator (shows “1.0×” by default)
-
Select your preferred speed from the options:
-
0.5× - Half speed for detailed review
-
0.75× - Slightly slower
-
1.0× - Normal speed (default)
-
1.25× - Slightly faster
-
1.5× - Faster review
-
1.75× - Even faster
-
2.0× - Double speed for quick review
Sharing Audio Recordings
You can share recordings in two ways:
From the Session Screen:
-
Find the audio player in your session
-
Tap the audio player menu icon
-
Select Share audio file on mobile, or Show in folder on Mac and Windows
-
Choose your preferred sharing method
-
Select recipients and send
From Your Device’s Files:
-
Navigate to the recording using the steps above
-
Long press (Android) or tap Share (iOS)
-
Choose your sharing method
-
Select recipients and send
Remember that audio recordings may contain sensitive information. Always be mindful of who you share them with.
Deleting Audio Recordings
You can delete the audio recording of a session without deleting the session itself.
From the Session Screen:
-
Find the audio player in your session
-
Tap the audio player menu icon
-
Tap the “Delete audio recording?”
-
Confirm the deletion
Storage and Management
-
Recordings are stored locally on the device that captured them, never in Hedy’s cloud
-
Each hour of recording uses approximately 30MB of storage
-
Files are in M4A format for high quality and small size
-
You can delete recordings through your device’s file management system
Pro Tip: Consider regularly reviewing and cleaning up old recordings to manage storage space on your device.
Enabling Storage Permissions for Hedy
If you’re experiencing issues with Hedy saving audio recordings on your device, you may need to manually enable storage permissions. Follow these steps for your specific operating system:
Android
1. Open your device’s Settings app.
2. Tap on “Apps” or “Application Manager”.
3. Find and select “Hedy” from the list of installed apps.
4. Tap on “Permissions”.
5. Look for “Storage” or “Files and media” permission.
6. Toggle the switch to enable the permission.
If you don’t see the storage permission option, you may need to:
1. Go back to the main Settings menu.
2. Tap on “Privacy” or “Privacy & Security”.
3. Select “Permission Manager” or “App Permissions”.
4. Tap on “Storage” or “Files and media”.
5. Find Hedy in the list and grant the necessary permissions.
iOS
On iOS, apps don’t have direct access to the file system outside their own container. However, you can ensure Hedy has the necessary permissions:
1. Open the Settings app on your iPhone.
2. Scroll down and tap on “Hedy”.
3. Look for permissions related to “Microphone” and ensure it’s enabled.
4. If you see a “Files and Folders” option, make sure it’s also enabled.
Additionally, when Hedy attempts to save a recording for the first time, iOS should prompt you to allow access. Make sure to tap “Allow” when this happens.
If you’re still experiencing issues after enabling these permissions, please contact our support team for further assistance.